Floor plan & markers
Floor plans make the workflow visual: you see at a glance which inspection item hangs where — especially useful for field staff.
Plan viewer
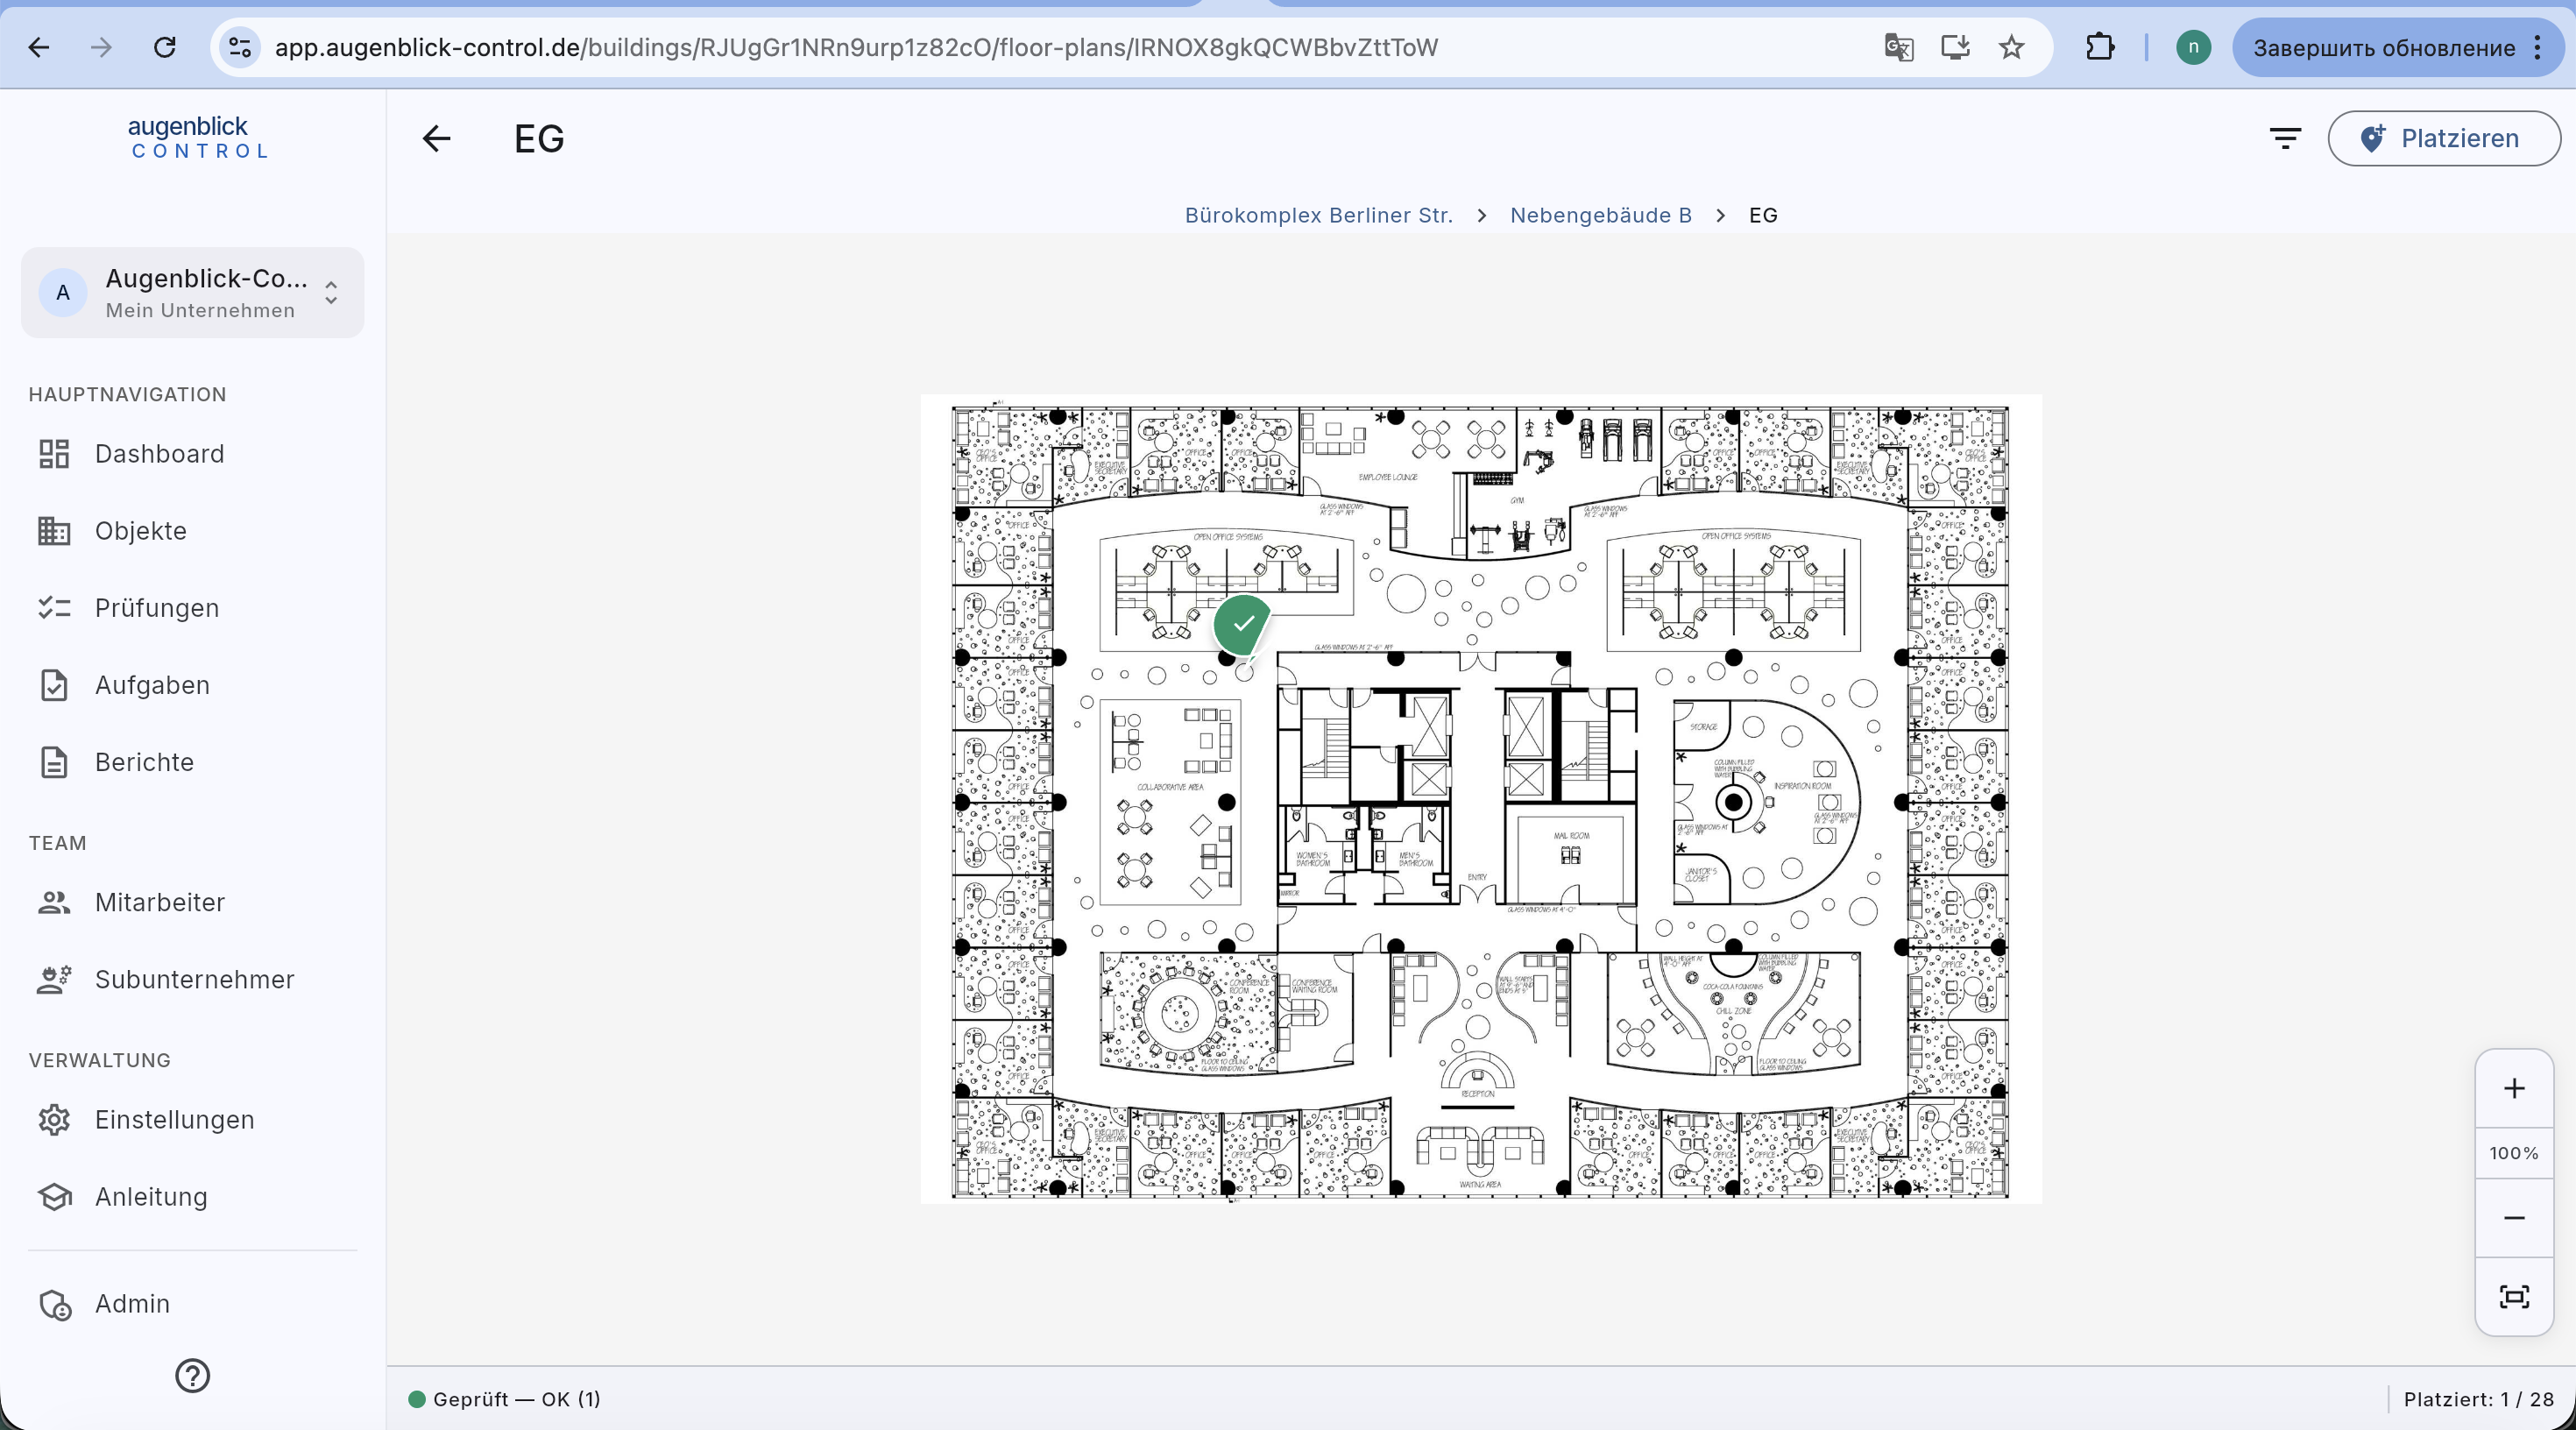
- Arrow ← — back to the building overview.
- Platzieren — starts the placement mode.
- Zoom (bottom right) —
+/-/ fit-to-screen. - Markers on the plan — color-coded by status (green inspected, yellow due soon, red overdue / defect).
- Tap a marker → element detail.
Place elements
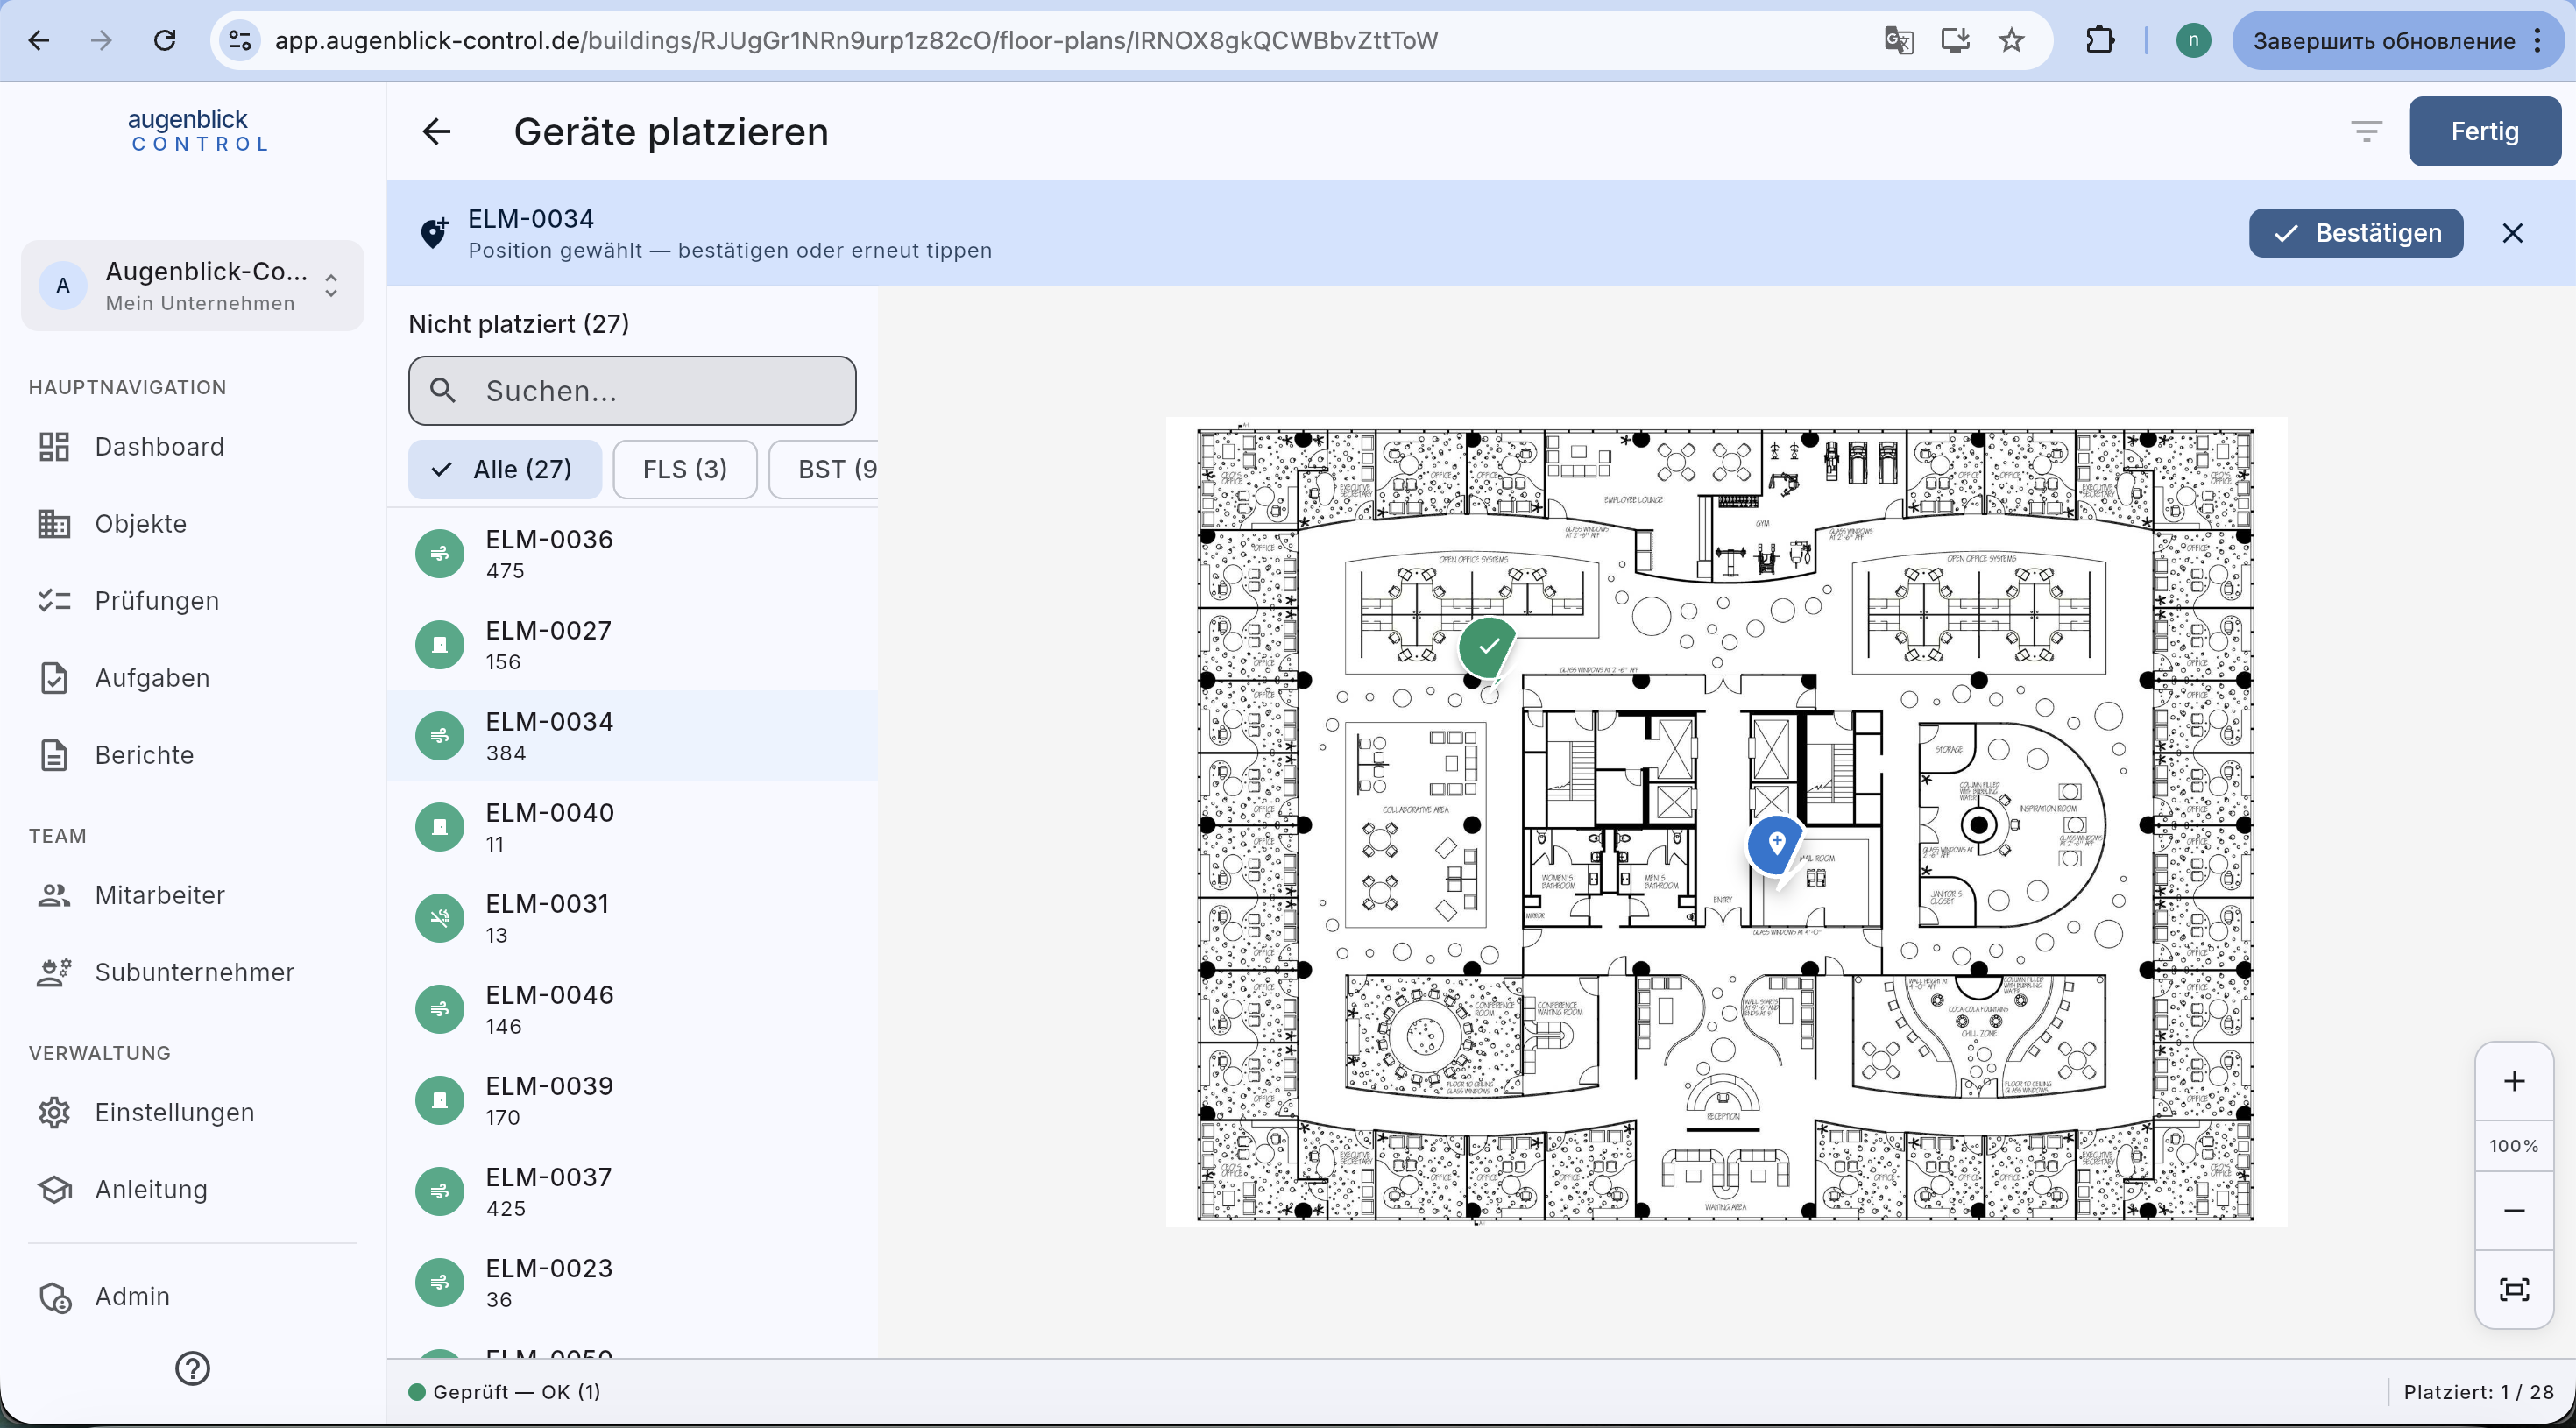
- Tap Platzieren.
- Left: Nicht platziert list — filter by category (All / FLS / BST / BSK / ...).
- Tap an element from the list — it's selected.
- Tap on the plan where it sits — a marker appears.
- Bestätigen commits the position. Fertig exits the mode.
Wrong position? Just tap again on the plan — the marker jumps.
Tip: Place multiple elements in a row — the list closes automatically after Bestätigen and the next element is pre-selected.
Upload a plan
In the building's Grundrisse tab tap + Hinzufügen — PDF, PNG or SVG supported. One plan per floor / level.