Start a new inspection
An inspection always starts with a selection: which category, which element. Three ways to get there:
- + Neue Prüfung button (top right of the inspections page).
- Code scannen card on the Dashboard.
- Prüfung button on a building or element detail page.
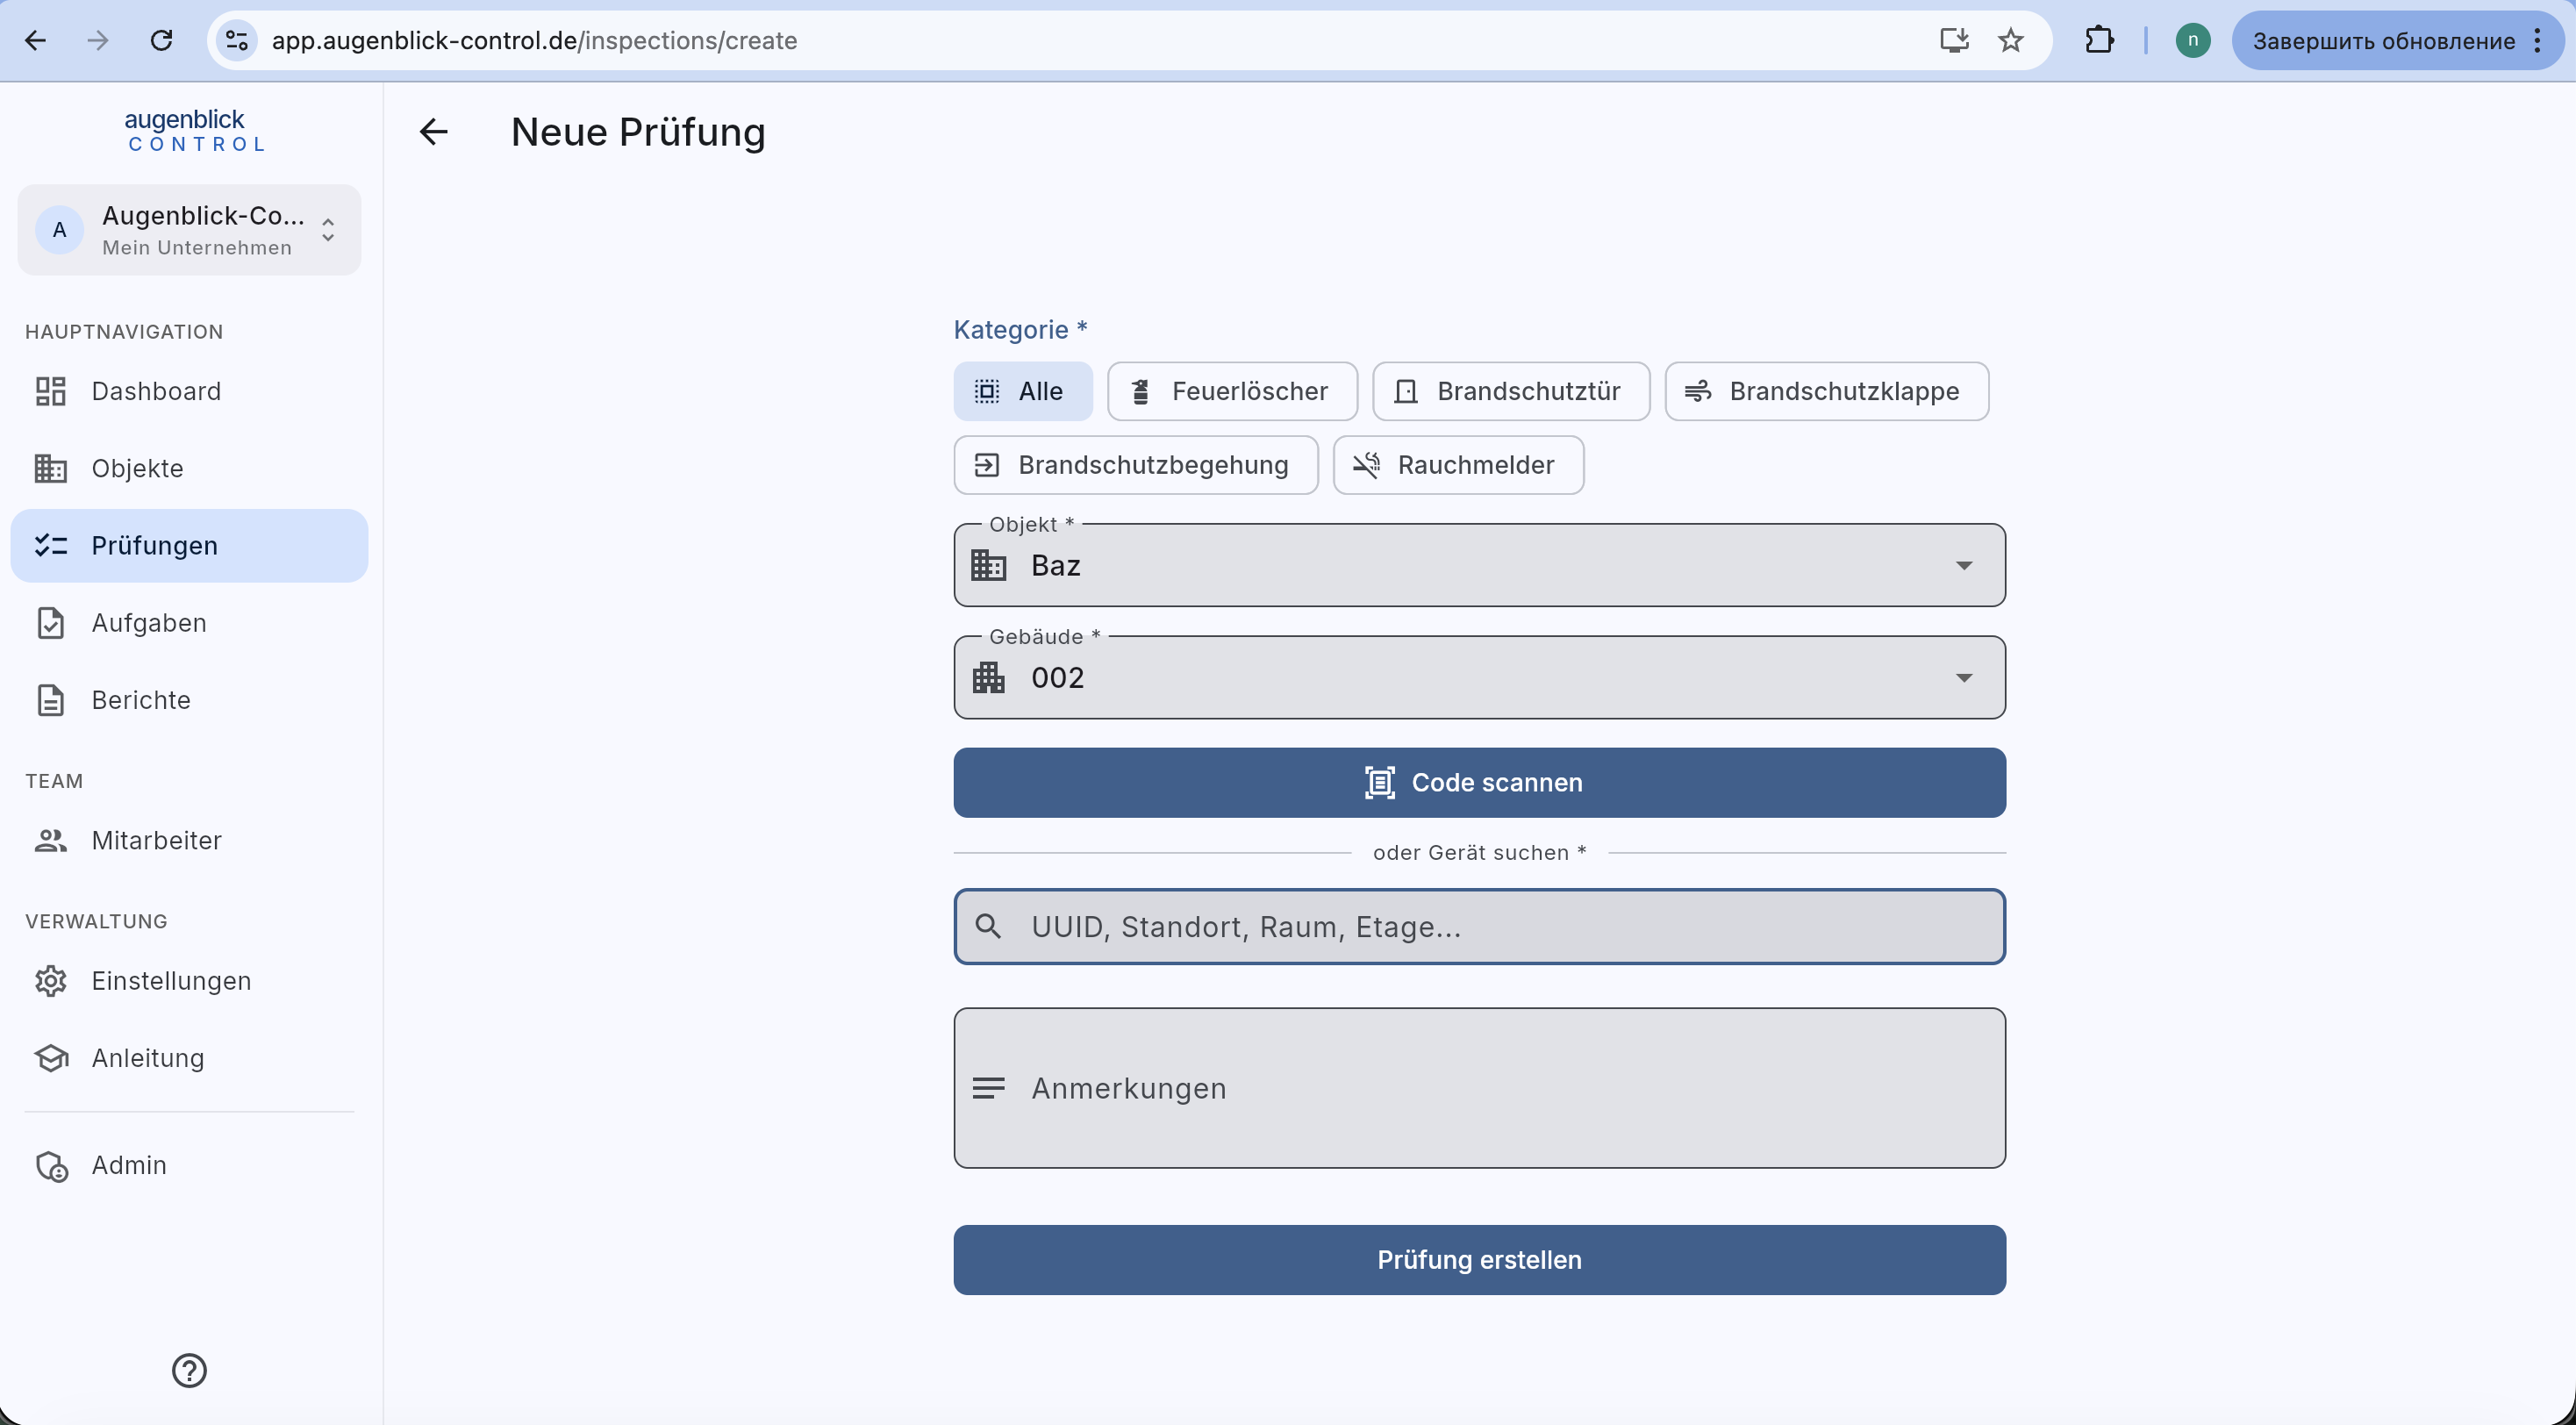
Step by step
- Choose category — Feuerlöscher / Brandschutztür / Brandschutzklappe / Brandschutzbegehung / Rauchmelder. Or "Alle" for mixed lists.
- Objekt — pick the property.
- Gebäude — pick the building.
- Find element — either via:
- Code scannen (QR / barcode) — fastest on site.
- Search by UUID / location / room — when the code isn't readable.
- Optional: Anmerkungen (notes).
- Prüfung erstellen — creates the inspection with the entered data.
Doors and hold-open systems
Choose the inspection cycle before filling in the form: annual maintenance or monthly inspection. Monthly inspections are available when the hold-open system (FSA) is saved in the element's master data. Selecting FSA in an annual protocol alone does not change that master data.
The standard checklist distinguishes doors, doors with FSA, and gates. Custom checklists keep their saved points; the app shows a notice. Switching after entering answers requires confirmation before those answers are discarded.
Stammdaten
When the element was first created, manufacturer / type / year / serial number were entered (Stammdaten). They auto-fill into every new inspection — you don't have to type them again.
Tip: When inspecting many similar elements, just scan the next code — the app opens the selected element. For doors, choose the inspection cycle next.
What's next
- Fill in an inspection — checkpoints, defects, photos, assessment
- UUID codes — generate and stick QR labels